Today I am going to introduce a physical computing device that will add fun and depth to your projects. The first thing I will need is two brave volunteers that do not mind jumping up and down and basically doing silly things in front of the class.
Z heart beat blue
X heart beat red
Discussion Prompts: Can anyone guess what is going on? Explain how the signal goes to the MakeSense! computer which then turns the signal into a keyboard stroke. Show the MakeSense! software. There are unlimited amount of sensors and you can even make your own if you can not find what you need. The most basic type of sensor is on/off. Think of a light switch it is either on or off. The on/off sensors that I have on hand include the heart beat sensor, touch sensor, and the magnet sensor. Lets start with the touch sensor. You will see three connectors two of which you should be familiar with
1. Vcc is volatage (+ sign of your battery)
2. GND (is your negative side)
Bring in white LED to show them it light up between + and –
The third connector is something new. Can anyone guess what the out is for? When you touch the switch electricity is put through the out connector to the MakeSense! board and the MakeSense! board converts that to a key. Breaking up into groups of 3 we are going to examine our make senseSoftware and get something working (show with lighting up another white led in the center).
How to set up the Hardware:
1. Using your screwdriver connect a cable to to the MakeSense! board then either your magnet, touch sensor, or heart beat monitor (notice the heartbeat monitor comes already connected). Make sure the cable are connected positive to positive, negative to negative, and out to center of the board. If you are unsure please request assistance following our outlined assistance procedure.
2. When you are ready to plug your device in please call me over and I will check the connections and give you a USB cable to connect your MakeSense! Board to your laptop.
3. Each group gets one computer to share
4. Open up the preloaded MakeSense! software Go -> applications -> sketch_raw_data3.
5. Together we will set up sensor0 with the following Letter A on the top most configuration one shot (default) very low (default) keyboard (default)
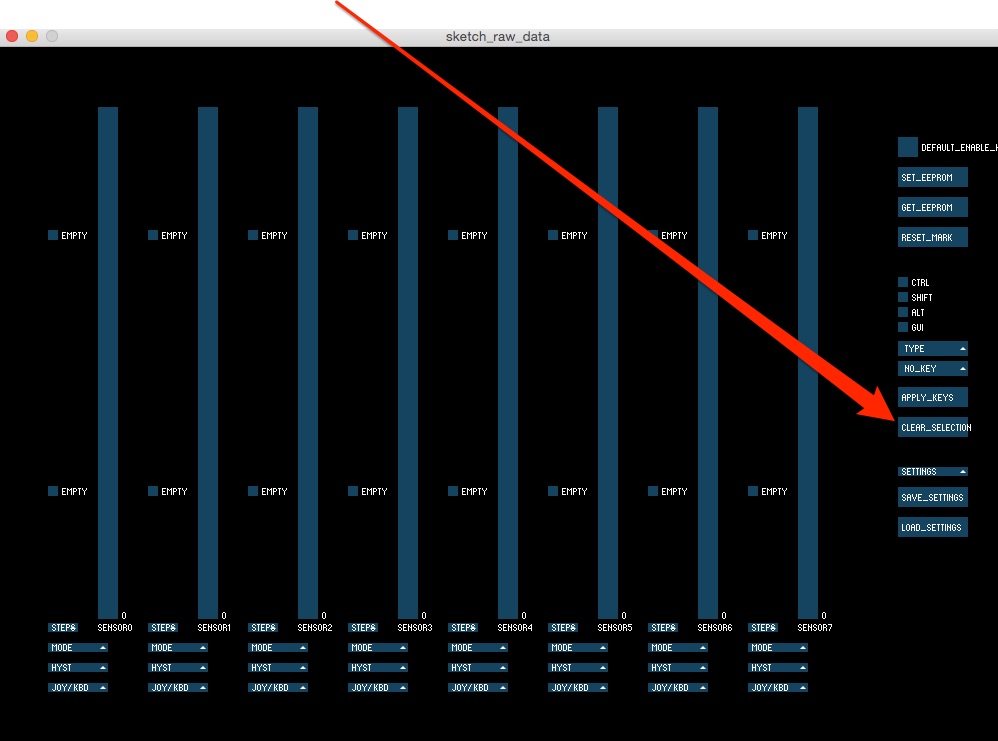
CLEAR_SELECTION

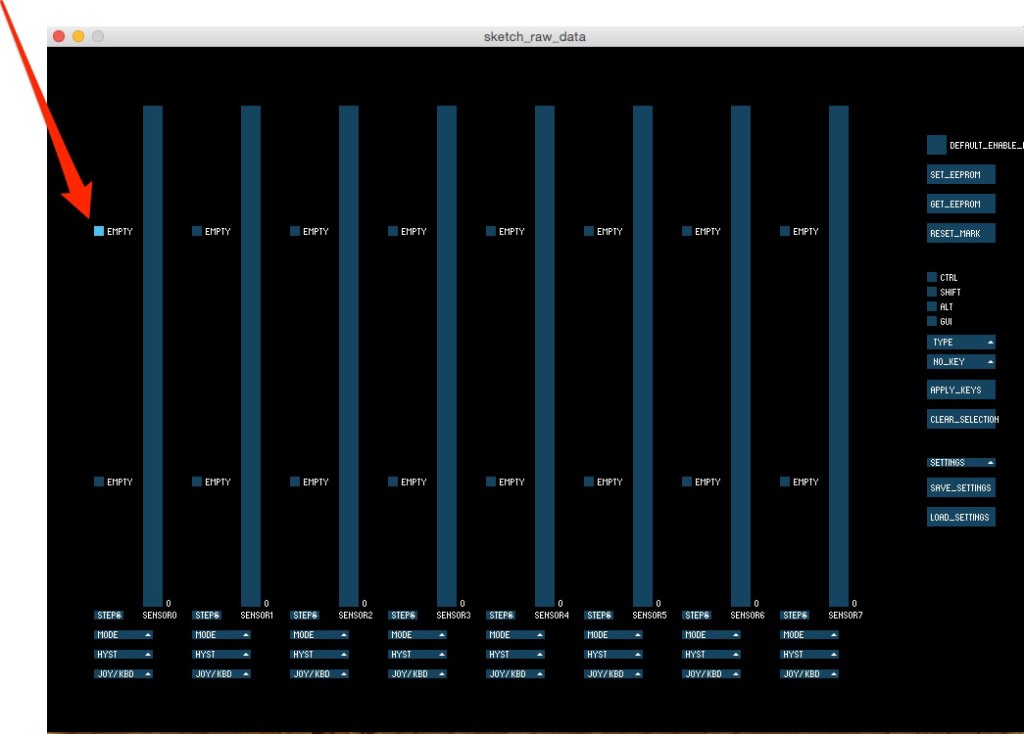
click on the upper most blue square next to the empty box until it is light blue
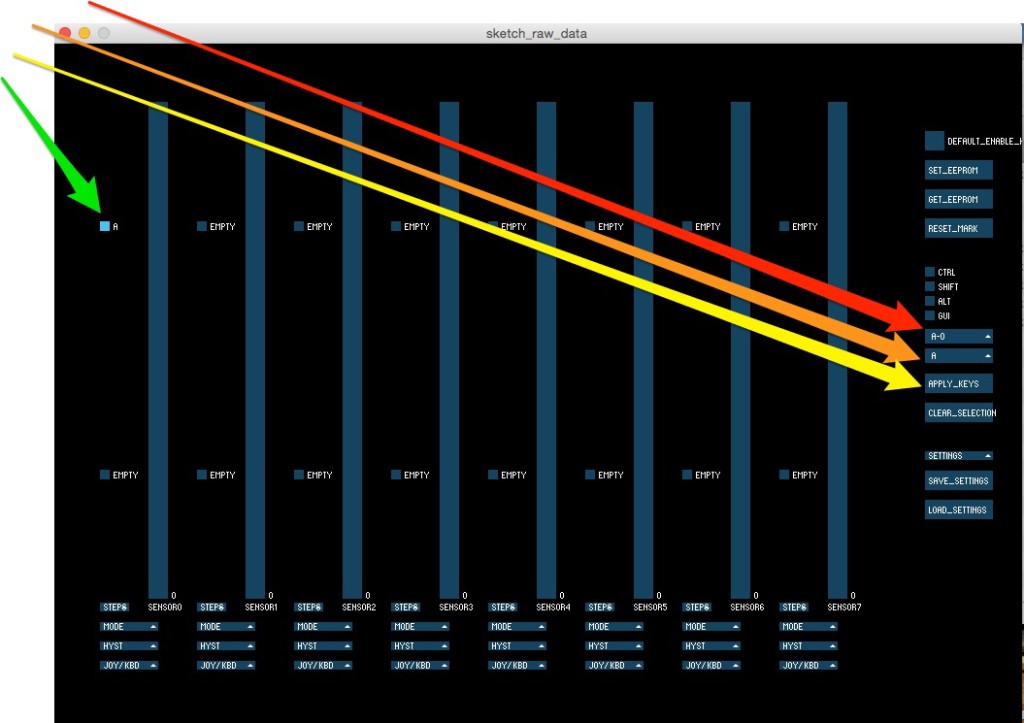
Choose A-0 select A APPLY_KEYS notice change
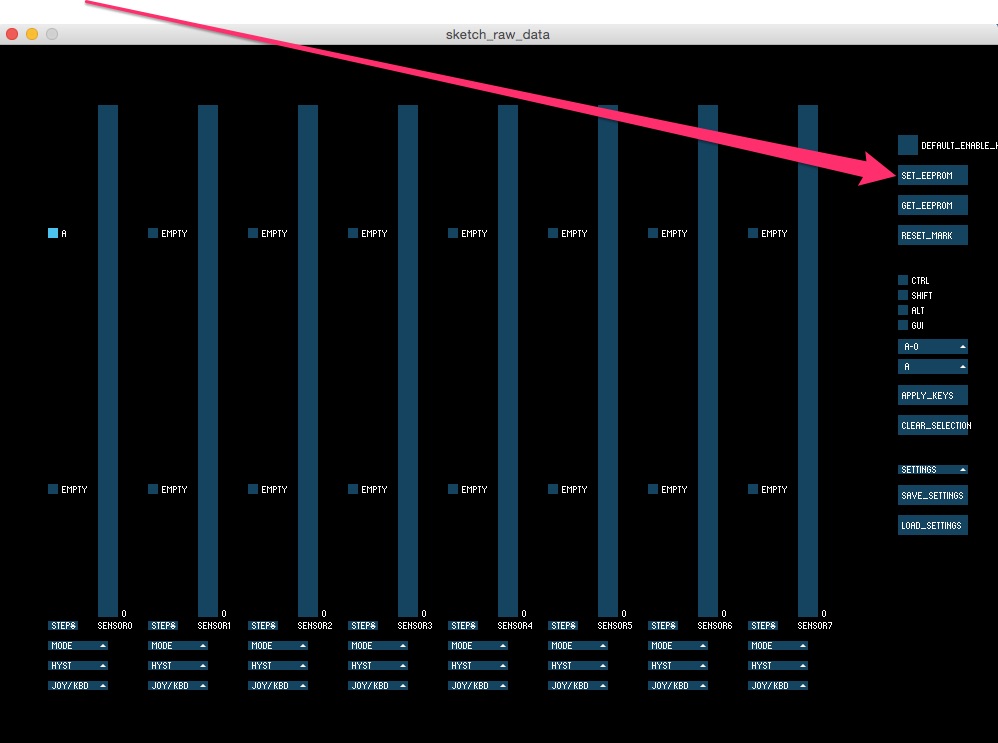
SET_EEPROM (sends it to MakeSense! board)
6. Open Scratch
7. Create a Scratch project with a sprite reacting when the A key hat block is pressed. Make sure Scratch is used as your main window.
8. press the SW1 on your MakeSense! board this will cause the green light to go solid and for the MakeSense! board to send keyboard strokes to the computer. (always turn this off if you are not using it)
9. Did it work? Review all your steps if it did not.
10.Challanges
– Change the letter.
– Change the location on Sensor 0 from A up high to A down low what happens?
Hint: watch the MakeSense! software as you use scratch.
– switch your sensor for the other on/off sensor (either touch sensor or magnet)
Change from one shot to hold.


